Replacing blender blades is a task that requires careful attention to avoid injury or damage to your appliance. Here's a quick overview:
- Why It Matters: Sharp, properly installed blades improve blending efficiency and protect your blender's motor from strain.
- Key Risks: Mishandling blades can cause cuts, leaks, motor issues, or even permanent damage to your blender.
- Preparation: Use tools like a small screwdriver, needle-nose pliers, and cut-resistant gloves. Work on a stable, well-lit surface.
-
Steps:
- Turn off and unplug the blender.
- Carefully remove the old blade assembly.
- Clean and dry the blade housing area.
- Install the new blade, ensuring proper alignment and secure threading.
- BLENDi-Specific Note: BLENDi portable blenders have non-removable blades. For issues, check the seal or contact BLENDi support.
Proper maintenance, like cleaning after each use and replacing seals regularly, helps extend your blender's lifespan. If problems persist, consult the manufacturer for professional support.
KitchenAid Blender Blade Safe Removal

Tools and Preparation for Blade Replacement
Getting ready the right way is key to safely replacing the blade in your BLENDi portable blender. Having the proper tools and setting up your workspace can make the process smoother and help avoid accidents. Here's what you'll need and how to prepare.
Tools and Materials You'll Need
To replace the blade, you'll need a few basic tools:
- A small Phillips head screwdriver
- Needle-nose pliers for handling tiny parts
- Cut-resistant gloves to protect your hands from sharp edges
Set up on a stable, well-lit surface to keep everything secure and visible. A small bowl or magnetic tray is handy for holding screws and small components during disassembly, so nothing gets lost.
You'll also need cleaning supplies. Use dish soap, warm water, and a soft-bristled brush to clean the blade assembly area before installing the new blade. Dry everything thoroughly with paper towels or a lint-free cloth to ensure no moisture gets into the motor or battery compartment.
If your BLENDi model has any specific requirements, check the user manual for additional tools or instructions.
Safety Steps Before You Begin
Start by turning off the blender and unplugging it. Remove the blending jar from the base and make sure it's empty. Rinse away any leftover residue to prevent slippery surfaces while handling the blade.
Choose a workspace free from distractions. Put away phones or anything else that might pull your attention away from the task at hand.
BLENDi-Specific Preparation Tips

BLENDi portable blenders often have unique features that could affect how you replace the blade. For instance, some BLENDi Pro+ models include a water bottle conversion piece that simplifies blade removal. Always consult your BLENDi user manual for instructions specific to your model. The design details of BLENDi products mean following the manual is essential for a safe and smooth process.
How to Replace Blender Blades Step by Step
Once you’ve gathered your tools and set up your workspace, it’s time to get into the nitty-gritty of replacing your blender blades. The steps can vary depending on the type of blender you own, so follow these instructions carefully to avoid injury and ensure everything is installed correctly.
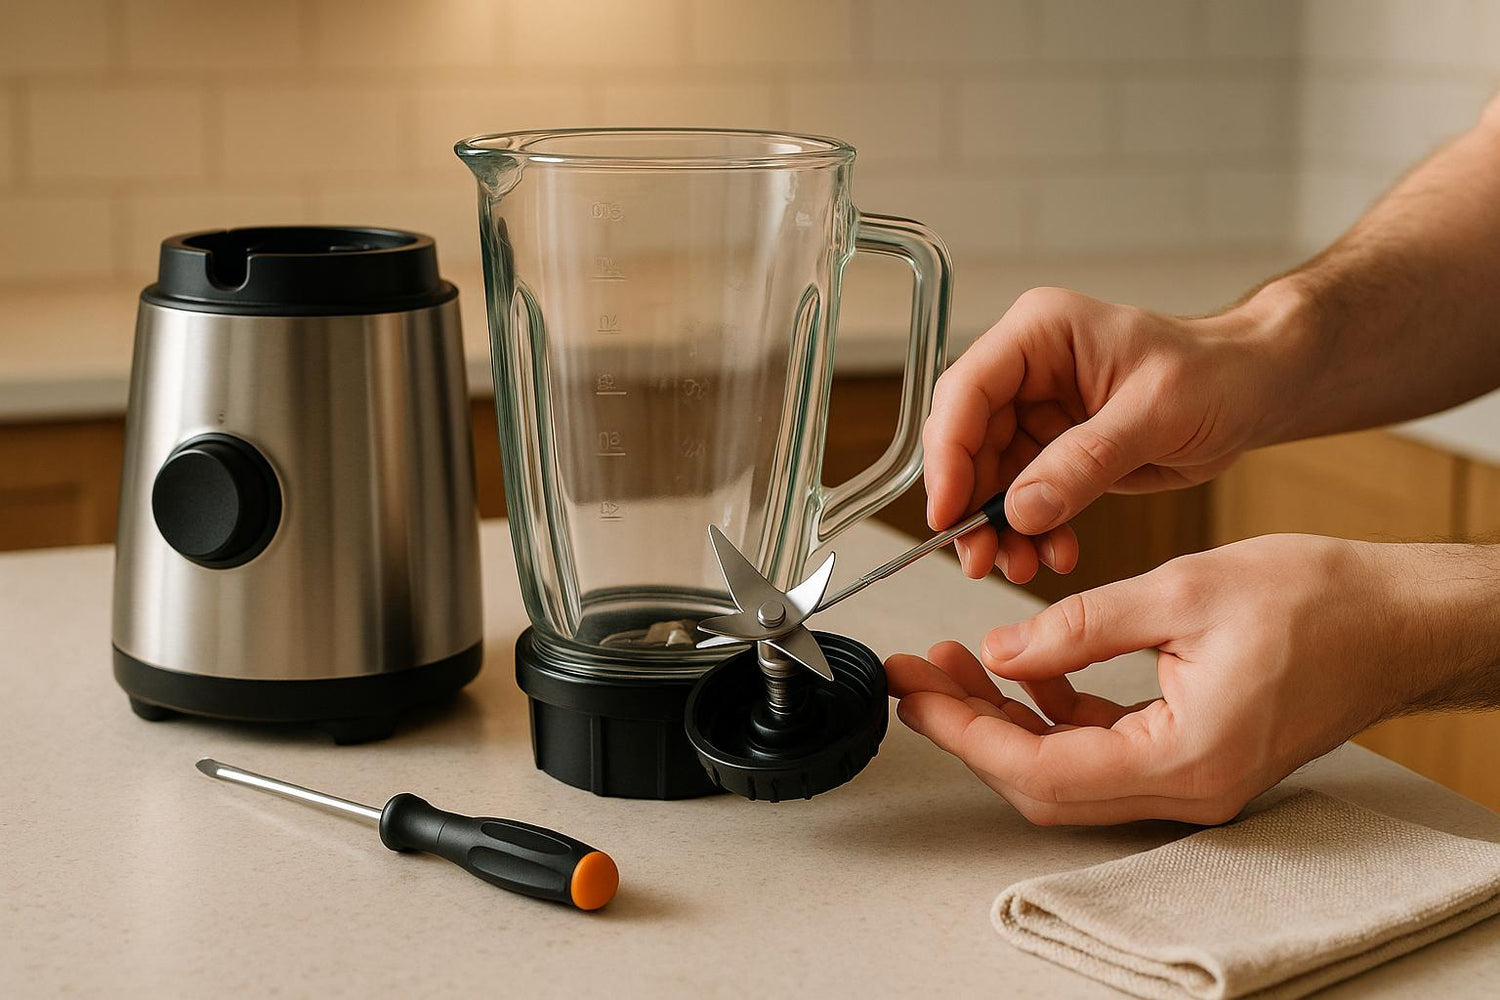
Taking Out the Old Blade
Start by unplugging your blender. Safety first! Locate the retaining nut or bottom plate at the base of your blender jar - this part secures the blade assembly. For most standard blenders, you’ll need to turn the plate counterclockwise to loosen it. If it’s on too tight, hold the base securely to gain better leverage.
Handle the blade assembly with care. As repair expert John Ringwald advises:
Be careful of the blades - they're very sharp and pointed.
Once the retaining plate loosens, flip the blender over slowly to prevent the blade from falling out and causing injury.
If you’re struggling to unscrew the blade, try lubrication. Drip a bit of vegetable oil around the area where the jar connects to the base. Then, add warm water and dish soap to the blender, secure the lid, plug it in, and run it for about 30 seconds. After unplugging the blender, attempt to unscrew the base again. For particularly stubborn blades, a rubber strap wrench can help, while someone holds the blender base steady on a secure surface.
With the old blade assembly removed, you’re ready to move on to the next step.
Putting in the New Blade
Before installing the new blade, clean the blade housing area thoroughly with warm, soapy water, and make sure it’s completely dry. Position the new blade assembly exactly as the old one was - it’s crucial to get the alignment right. The blade should sit snugly against the bottom of the jar without any gaps or wobbling.
Next, place the gasket or rubber seal into its groove, ensuring it’s flat and free of twists. Thread the retaining nut or bottom plate back on by turning it clockwise. Tighten it by hand until it’s secure, then use your tools to give it an extra quarter-turn. Be cautious not to over-tighten, as this could damage the threads or crack the jar.
Give the jar a gentle shake to check your work. If the blade rattles or feels loose, disassemble it and try again, making sure everything is properly aligned.
Special Instructions for BLENDi Blenders
BLENDi portable blenders work a little differently from traditional countertop models. According to BLENDi’s official guide:
The blade is not removable.
This means you can’t replace the blades as you would with standard blenders. Instead, BLENDi uses a non-removable blade system that’s integrated into the blending base. So, if you’re experiencing issues, it’s best to follow BLENDi’s official recommendations rather than attempting to replace the blade yourself.
For problems like leaks, BLENDi suggests checking the rubber seal first. If the seal is warped or damaged, you can order replacement parts directly from their website: https://blendiblender.com/products/replacement-parts.
If the issue seems related to blade performance, contact BLENDi’s customer support team. Since the blade system is sealed and non-serviceable, trying to disassemble it could void your warranty and potentially damage the motor or battery compartment. BLENDi’s 1-year warranty covers manufacturing defects, including blade-related issues under normal use.
The integrated design of BLENDi blenders has its perks. It prevents leaks during travel and eliminates the risk of losing small components, though any blade maintenance will require professional service or replacing larger assemblies through BLENDi’s official channels.
sbb-itb-75eb6cf
Safety Checks and Maintenance After Replacement
How to Check Your Work
Start by visually inspecting the blade assembly and the rubber gasket. Make sure the gasket is securely aligned, lies flat in its groove, and shows no signs of twisting or damage. Next, fill the blender jar halfway with water, secure the lid tightly, and run the blender on low speed for 10–15 seconds. Watch carefully for any leaks, strange noises, or unusual vibrations during this test.
If the blades don’t spin smoothly, you hear grinding sounds, or the gasket looks out of place, stop immediately and reassemble the parts. For BLENDi models, refer to the earlier section with specific instructions for those units. If problems persist after reassembly, it’s best to reach out to BLENDi customer support for further assistance.
Once everything checks out, proper care and maintenance will keep your blades working efficiently for a long time.
Tips to Make Your Blades Last Longer
After confirming your blender is in good working order, follow these tips to extend the life of your blade assembly. After each use, unplug the blender and disassemble the jar. Rinse it halfway with warm water and add 1–2 drops of dish soap. Reassemble the jar and run the blender on high speed for 15–20 seconds, then rinse thoroughly.
For a deeper clean, you can blend a solution of ¼ cup warm water with ¾ cup white vinegar, or mix ¼ cup baking soda with ¼ cup warm water to tackle stubborn residue.
If you’re blending frozen ingredients, let them sit at room temperature for a few minutes before use to avoid putting extra strain on the blade assembly. When storing the jar, keep the lid loosely fitted to help preserve the rubber seals.
Check your blender’s manual to see if the jar and lid are dishwasher safe - many modern models are. However, always hand-wash the motor base with a damp cloth. Never submerge the motor base in water or place it in the dishwasher.
Lastly, replace the rubber seals and gaskets every 12–18 months, or sooner if you notice cracks, hardening, or deformation. These parts are inexpensive to replace and can help prevent leaks and other issues, saving you from costly repairs down the road.
Fixing Problems and Getting BLENDi Support
Common Blade Replacement Problems
Replacing the blade on your BLENDi blender can sometimes lead to a few hiccups. One common issue is leaking, which often happens if the gasket isn’t seated properly or the seal is damaged.
Hearing grinding or scraping noises? That’s usually a sign that the blade assembly isn’t threaded correctly. Turn off the blender and carefully tighten the blade assembly by hand, turning it clockwise until it clicks securely into place. For BLENDi portable models, listen for a distinct click when the blade unit is properly seated.
If the blades feel wobbly or loose, they might need a little extra tightening. However, don’t overdo it - persistent looseness could mean the threading is worn out and may need replacement.
Experiencing poor blending performance? This could be due to installing the blades upside down or using the wrong blade type for your model. For example, BLENDi Lite models require a different blade assembly than the Pro+ or BLENDi X models. Double-check that you’re using the correct replacement part for your specific blender.
If your blender won’t turn on after replacing the blade, ensure all parts are assembled correctly and that the jar is securely positioned on the motor base.
If these adjustments don’t solve the problem, it’s time to explore professional support options.
When to Get Professional Help
If troubleshooting doesn’t fix the issue, reaching out to BLENDi customer support is your next step. Persistent leaks may be covered under the 1-year warranty, which typically includes defects in the blade assembly or motor. Keep in mind, though, that this warranty doesn’t cover issues caused by improper installation or regular wear and tear.
Certain problems, like cracks in the jar or blade assembly, damaged threads, or electrical issues (such as a motor that won’t respond even when everything is properly assembled), might require replacement parts or expert repairs. These situations are best handled by BLENDi’s support team.
For motor-related problems - like unusual burning smells, sparking, or a motor that won’t power on - it’s crucial to avoid DIY fixes due to potential safety hazards. BLENDi’s experts can help determine whether the issue stems from the blade replacement or something else entirely.
If you’ve misplaced or damaged critical parts during the blade replacement process, BLENDi customer support can guide you in obtaining the correct replacements for your model. Additionally, if the problem arises within the first 30 days of purchase, BLENDi’s return policy allows for exchanges or returns, offering peace of mind if blade replacement uncovers manufacturing defects or compatibility issues.
Conclusion
Replacing your blender blade safely is crucial for keeping your BLENDi running smoothly. It starts with having the right tools and replacement parts ready, setting you up for a straightforward and safe process.
The process is fairly consistent across all BLENDi models: carefully remove the jar and take your time unscrewing the old blade assembly. Since each model has specific threading and blade requirements, it’s important to use the correct parts to avoid any compatibility issues.
Regular upkeep - like cleaning, proper storage, and routine inspections - goes a long way in extending the life of your blades. Staying on top of maintenance helps you catch potential problems early, preventing them from affecting performance or becoming safety concerns.
If you run into issues despite careful maintenance, try troubleshooting. Stop immediately if you notice unusual noises or leaks, and for more serious concerns like electrical problems or cracked parts, rely on BLENDi's support team. Don’t forget, their 1-year warranty covers certain issues, so professional help might be the best route.
Blade replacement is just part of keeping your BLENDi in top shape. With proper care and attention to detail, you can count on your portable blender to deliver smooth, blended drinks wherever life takes you.
FAQs
What should I do if my BLENDi blender is still leaking after replacing the blade and checking the seal?
If your BLENDi blender is still leaking, start by ensuring the gasket is seated correctly and free from any dirt or debris. Check the container carefully for any cracks or damage, and confirm that the retaining ring is tightened securely. It's also a good idea to clean and dry all parts thoroughly before putting them back together - this helps prevent residue buildup that could lead to leaks. If none of these steps solve the problem, it might be time to contact BLENDi's customer support for additional help.
How can I tell if motor problems in my blender are caused by incorrect blade installation?
Motor issues in a blender are frequently caused by improper blade installation. When the blades aren’t securely fastened or aligned correctly, the motor can end up working too hard, overheating, or even failing to operate as it should. You might notice the motor running while the blades stay still, hear unusual noises, or experience overheating that risks damaging the motor.
To prevent these problems, make sure the blades are firmly secured and properly aligned with the motor shaft when installing them. Correct alignment minimizes strain on the motor, helping your blender perform well and last longer.
How can I tell if my blender's blade needs to be replaced, and how often should I check it?
If your blender isn’t performing like it used to, it might be time to check the blade. Signs such as dull edges, visible damage, or a noticeable drop in blending efficiency could mean the blade needs replacing. These problems can make it tougher to achieve smooth textures or blend harder ingredients effectively.
To keep your blender running smoothly, make it a habit to inspect the blades regularly - especially if you use it often. A quick check once a month can help you spot wear and tear early. If the blade shows signs of damage, replacing it promptly ensures both better performance and safer operation.

0 comments